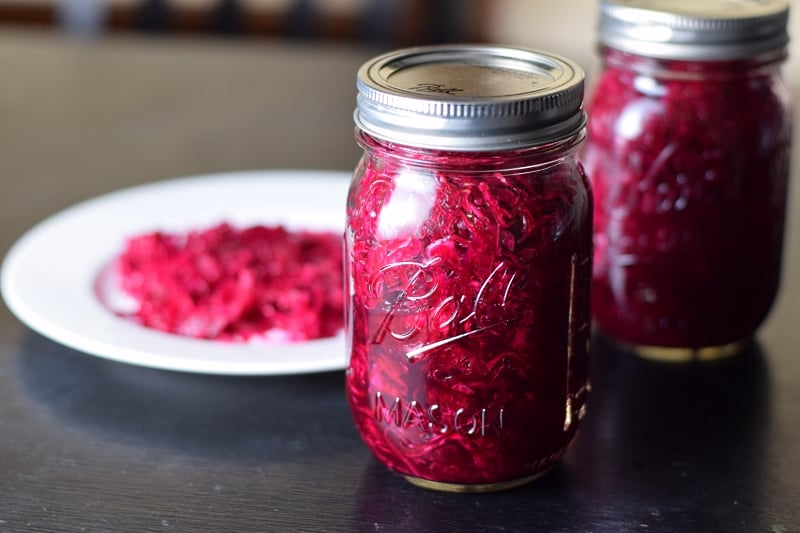
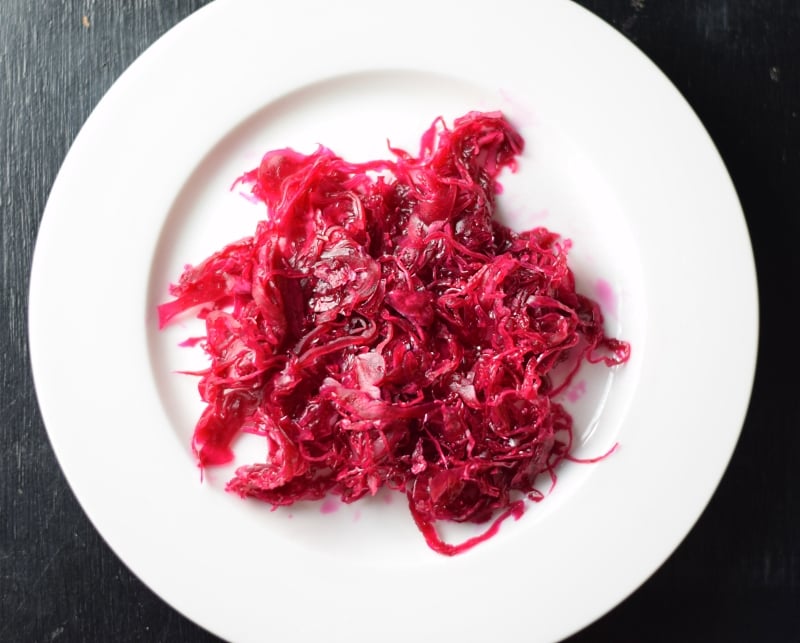
Did you even know you can make homemade fermented sauerkraut? Many people don’t even think about it but with a few important tips, it is easy to do and far more nutritious than anything you will purchase from the grocery store. This homemade kraut is made the way traditional sauerkraut has been made for centuries, through the miracle of lacto-fermentation.

However, most homemade recipes I have found aren’t comprehensive enough to help first-time fermentologists successfully replicate the taste and texture reminiscent of something you would purchase from the grocery store. After all, that is the goal isn’t it - reproduce a great homemade sauerkraut that you can use in all the same manners as the store-bought varieties?
This post has been months in the making as I've tried to provide a comprehensive and foolproof set of instructions to help anyone successfully make perfect homemade fermented sauerkraut on the first try!
Health Benefits of Fermented Sauerkraut
First, let’s talk about why you should make your own homemade fermented sauerkraut. Lacto-fermentation creates good bacteria and probiotics that provide a number of health benefits over commercially made sauerkraut. Fermented sauerkraut is renowned for improving digestion.
The fermentation process also increases vitamin levels in the kraut, and some claim it has anti-carcinogenic properties that can help prevent cancer. However, the only way to glean these benefits is to eat it raw. Cooking will kill these beneficial organisms, which is another reason commercially processed sauerkraut can never be as healthy.
Equipment Needed
There are two very important pieces of equipment needed to make homemade fermented sauerkraut.
1. A fermentation vessel. This is what you will be fermenting the cabbage in over the course of a few weeks. Traditionally a fermenting crock was used. These are really cool looking, heavy, and a little pricey. I like them mainly for their nostalgic value but the price tag keeps me at bay. Instead, I use half gallon mason jars. Inexpensive but equally effective.
2. Mandoline – This is the secret right here to perfectly thin soft cuts of kraut like you would get from a store brand. If using a knife instead, you will likely be left with thicker slices of crunchy kraut that will have a different texture compared to the sauerkraut you grew up eating. Unless of course your knife skills and patience are infinitely better than mine.

Ingredients Needed
- 5 lb cabbage (red or green)
- 3 tablespoon pickling salt, plus more for brine
- Brine of 4c water + 1 ½ tablespoons salt
- 1 Cabbage leaf per jar (optional)
You may wonder why many homemade sauerkraut recipes call for 5 lb of cabbage. This is because that is the average size of a full head. If your head of cabbage is a little bigger or smaller just adjust the salt accordingly keeping roughly the same ratio.
You can use red or green cabbage with equally good results. I like red cabbage because it produces a vibrantly purple kraut. Plus the pigment that creates the deep purple color is indicative of anthocyanins, which are powerful antioxidants. Green cabbage is traditionally used for the more common pale-colored sauerkraut.
Don’t use table salt. Table salt has iodine and anti-caking agents in it which can affect the color and some people complain it affects fermentation. You can substitute sea salt or kosher salt, but you will want to substitute by weight, not by volume, since the salt crystals are going to be larger than pickling salt.
Don’t use tap water without first boiling or filtering it. The chlorine in most tap water can hinder fermentation. Alternatively you can buy distilled or filtered water instead.
Make a batch of the brine keeping a ratio 4 cups of water per 1 ½ tablespoon of pickling salt. Boiling it together in advance will help the salt dissolve properly but be sure to let it cool before pouring it on the cabbage so it doesn't cook the cabbage.
How to make it
Quarter cabbage and cut out the solid core that is near the base. Lay cabbage flat on mandolin (so rounded side is up) and slice thinly into 1/16” strips (⅛” strips would be my recommended maximum thickness). Check out How to Cut Cabbage for step by step photos and instructions if needed.
Add each quarter of strips into a large bowl, sprinkling with salt as you go until all salt has been used. Ideally, let them sit for 30-60 minutes to extract additional water. You may also gently massage the shreds with clean hands to work additional water out.
Pack cabbage shreds and liquid tightly into a sanitized gallon crock, ½ gallon jars, or vessel of your choice. Pressing down firmly will expel more liquid.
Lay a large cabbage leaf over the top of the cabbage to prevent anything from floating to the surface. This is important because the fermentation happens under the liquid and keeping everything submerged prevents any nasties from growing on the kraut.
Tip: An alternative way to keep the kraut submerged is by filling a plastic food-safe bag with brine and place it into the fermenting vessel to prevent cabbage from making contact with air. Some fermentation crocks will come with weights to keep the kraut submerged, which would be ideal.

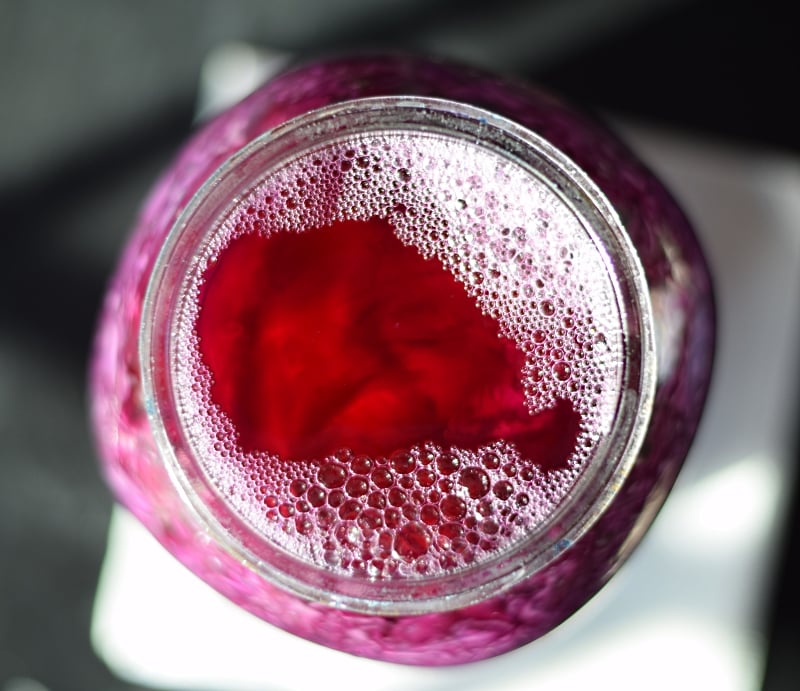
Tip: The bubbles let you know that it is fermenting properly.
Add brine only as needed to cover the top of cabbage. The water level will rise as it begins fermenting so be sure to keep the initial water level a few inches from the top of the vessel to prevent overflow.
If using a mason jar, place the lid on loosely enough for the fermentation to burp if needed. Don’t screw it on tight or you risk the jar exploding from pressure.
Set your fermentation vessel out of direct sunlight in a room temperature location to allow the fermentation process to start. If using clear mason jars I recommend finding a dark location. Nothing other than cabbage, water, and salt needs to be added for fermentation to begin. The salt level will keep harmful bacteria away long enough until lactic acid builds up and takes over as the primary preservative.
Check the fermentation every few days and remove any growth that may appear on the surface. This is typically krausen and though it looks like mold, it is not mold and it is not dangerous. However it can leave an off taste if left unattended.
FAQs
As long as everything smells OK, it is going well. If it begins to smell foul it has spoiled and needs to be tossed, however, I have never had this happen.
Let the sauerkraut ferment for around 6 weeks. I do recommend tasting it every few days so you can see how the flavor develops. When it has reached the tanginess that you desire place it in the fridge to stop the fermentation process. It can then be stored in the fridge for months. If left out of the fridge the flavor will continue to get sourer.
Yes, you can use fermented sauerkraut in any recipe requiring kraut. However, the heat from cooking above 115 degrees will kill much of the good bacteria created during the fermentation process.
More Sauerkraut Recipes

How to Make Homemade Fermented Sauerkraut
Ingredients
- 5 lb cabbage red or green
- 3 tablespoon pickling salt
- 1 ½ tablespoon salt per 4 cup water for Brine
- 1 Cabbage leaf per jar optional
Instructions
- Quarter cabbage and cut out the solid core.
- Lay cabbage flat on mandolin (so rounded side is up) and slice thinly into 1/16” strips (⅛” strips would be my recommended maximum thickness).
- Add each quarter of strips into large bowl, sprinkling with salt as you go. Ideally let them sit for 30-60 minutes to extract additional water. You may also gently massage the shreds with clean hands to work additional water out.
- Pack tightly into sanitized gallon crock, ½ gallon jars, or vessel of your choice.
- Lay a large cabbage leaf over the top of the cabbage to prevent anything from floating to the surface.
- Add brine only as needed to cover top of cabbage.
- If using a mason jar, place the lid on loosely enough for the fermentation to burp if needed. Don’t screw it on tight or you risk the jar exploding from pressure.
- Set your fermentation vessel out of direct sunlight in a room temperature location to allow the fermentation process to start.
- Check the fermentation every few days and remove any growth that may appear on the surface.
- Let ferment for around 6 weeks, tasting periodically so you can stop it when it reaches your desired flavor profile.
- Place in fridge to stop fermentation and store for months.


Brenda
We just made homemade sauerkraut for the first time, and sure wish I had found your post before hand... We also used green and red cabbage (what came out of our garden), and our friends are making disparaging remarks about our "pink" sauerkraut, so I was happy to see your pretty red sauerkraut on this post! We followed a basic recipe, though only left it ferment about 3 weeks. It is not real strong, but still pretty tasty. I printed out your post, and will be saving it for next time, though!
Fox Valley Foodie
Yes, I quarter the cabbage by slicing vertically, right through the core. Then the core is on a corner of each quarter, like you said. Then I trim off the solid part of the core from each quarter.
Kerry
Perfect, that's what I figured - going to try it this spring!
Kerry
Do you mean to quarter the cabbage along the core - so that the core is on a corner of each quarter? I always have extra cabbage from using it for coleslaw, etc. - this would be a nice way to keep the rest of it!